티스토리 뷰
바로 전에 글을 적은 부분은 Rest에 대한 부분을 충족하기 위한 개발이었다면 Web을 만들수 있는 방법에 대해서 이야기 하려고 합니다.
이전글에 CE 버전을 사용하시는 분들을 위해서 세팅하는 부분을 올려두었습니다.
2020/01/17 - [Web/Server] - IntelliJ IDEA CE. Spring Boot + Gradle
IntelliJ IDEA CE. Spring Boot + Gradle
IntelliJ를 싸게 나오면 꼭 무료 버전을 벗어나고 싶네요. 하지만 일반적으로 그냥 개발해도 되는 수준이어서 조금은 정리를 해보려 합니다. 저는 맥을 사용하기 때문에 맥에 대한 부분이 조금 더 들어가 있지만..
mrgamza.tistory.com
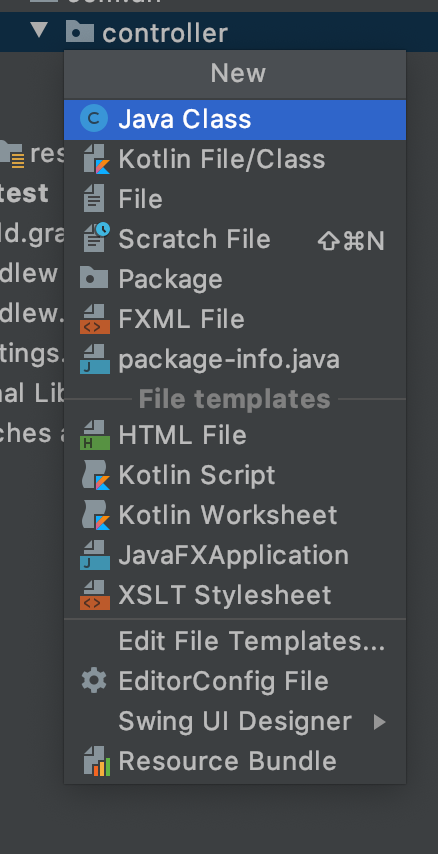
이전글에서 만든 RestController 말고 Web용도로 Controller를 만들어 봅시다.

저는 WebController라고 이름을 지었습니다.
package com.dh.controller;

import org.springframework.stereotype.Controller;
import org.springframework.ui.Model;
import org.springframework.web.bind.annotation.RequestMapping;

@Controller
public class WebController {

    @RequestMapping(value = "/test")
    public String test1(Model model) {
        model.addAttribute("name", "dh");
        model.addAttribute("nickname","power");
        model.addAttribute("image", "images/test.gif");
        return "test";
    }
}
이런 형태가 될겁니다. 두개를 받을건데요. 일단 test1 = JSP, test2 = thymeleaf 입니다.
1. JSP
dependencies를 추가하기 바랍니다.
dependencies {
    compile('org.springframework.boot:spring-boot-starter-web')
    testCompile group: 'junit', name: 'junit', version: '4.12'
    // JSP
    compile('org.apache.tomcat.embed:tomcat-embed-jasper')
    compile('javax.servlet:jstl:1.2')
}
jsp 폴더를 만들어 줍시다. webapp/WEB-INF/jsp를 만들면 됩니다.
그리고 그 안에 파일을 test.jsp파일을 만들어 줍시다.
<%@ page contentType="text/html; charset=utf-8"%>
<!DOCTYPE html>
<html lang="en">
<head>
    <meta charset="UTF-8">
    <title>JSP</title>
</head>
<body>
    <p>NAME : ${name}</p>
    <p>NICKNAME : ${nickname}</p>
    <p>
        PHOTO : <br>
        <img src="${image}">
    </p>
</body>
</html>
구조가 이렇게 될겁니다.

쯔위가 보입니다.

2. thymeleaf 이용
dependencies를 설정하여 줍니다.
dependencies {
    compile('org.springframework.boot:spring-boot-starter-web')
    testCompile group: 'junit', name: 'junit', version: '4.12'
    // Thymeleaf
    compile('org.springframework.boot:spring-boot-starter-thymeleaf')
}
html 파일을 만들어 줍니다. 구조는 resources/templates/ 아래입니다.
그 안에 test.html을 만들어 줍니다.
<!DOCTYPE html>
<html xmlns:th="http://www.thymeleaf.org">
<head>
    <meta charset="UTF-8">
    <title>thymeleaf</title>
</head>
<body>
<p>NAME : <span th:text="${name}"></span></p>
<p>NICKNAME : <span th:text="${nickname}"></span></p>
<p>
    PHOTO : <br>
    <img th:src="${image}">
</p>
</body>
</html>
뭐가 달라진지 모르겄죠? 하지만 웹페이지의 타이틀을 보게 되면 알수 있는데요.
한개는 타이틀이 thymeleaf이고 한개는 JSP입니다.
한가지 더 이미지는 resources/static/images에 넣어두어서
컨트롤러에서 images/test.gif 이렇게 넣어주어도 정상 동작하는겁니다.
관련 소스는 git에 올려두었음.
https://github.com/outofcode-example/spring-boot-gradle
outofcode-example/spring-boot-gradle
spring boot gradle example. Contribute to outofcode-example/spring-boot-gradle development by creating an account on GitHub.
github.com
'Backend > Server' 카테고리의 다른 글
| IntelliJ. spring-webmvc + gradle + tomcat. web application 구조로 만들기 (0) | 2020.01.18 |
|---|---|
| IntelliJ IDEA. Spring MVC + gradle + tomcat (1) | 2020.01.18 |
| IntelliJ IDEA CE. Spring Boot + Gradle (2) | 2020.01.17 |
| netstat로 정상적으로 구동되고 있는지 확인하여 보기 (0) | 2020.01.16 |
| IntelliJ에서 Maven으로 Tomcat에 배포하기 (0) | 2020.01.16 |
- Total
- Today
- Yesterday
- intellij
- ios
- Java
- war
- nodejs
- rxswift
- Spring
- Linux
- enum
- Xcode
- cocoapods
- go
- Gradle
- android
- SWIFT
- github
- windows10
- Codable
- docker
- git
- golang
- Windows
- Python
- Kotlin
- MySQL
- ubuntu
- tomcat
- centos8
- php
- CentOS
| 일 | 월 | 화 | 수 | 목 | 금 | 토 |
|---|---|---|---|---|---|---|
| 1 | 2 | 3 | 4 | 5 | 6 | 7 |
| 8 | 9 | 10 | 11 | 12 | 13 | 14 |
| 15 | 16 | 17 | 18 | 19 | 20 | 21 |
| 22 | 23 | 24 | 25 | 26 | 27 | 28 |
